What Is a Compost Bin & Why You Need One
A compost bin is a container or enclosure designed to accelerate and control the decomposition of organic waste — kitchen scraps, yard trimmings, leaves — into nutrient-rich compost. A DIY compost bin is a homemade version you build from repurposed or inexpensive materials so you can customize size, ventilation, and access to suit your home.
Why building a DIY compost bin? Cost savings, customization, reusing materials, and a hands-on way to reduce household waste and feed your garden naturally.
Benefits of Composting
- Reduces landfill waste: Diverts organic material from landfills where it would create methane.
- Improves soil health: Compost adds organic matter, improves structure, nutrient availability, and water retention.
- Saves money: Less need for chemical fertilizers and store-bought soil conditioners.
- Supports resilience: Healthier soil is better at holding water and resisting erosion.
- Climate benefits: Composting lowers greenhouse gas emissions compared with landfill disposal.
Types of Compost Bins You Can Make Yourself
Below are popular DIY designs — pick one that fits your space, budget, and how much waste you produce.
| Type | Pros | Cons / Considerations |
|---|---|---|
| Wooden box (pallets/boards) | Cheap, natural look, good insulation | Needs rot-resistant wood or treatment; bulky |
| Plastic tote / trash can | Light, portable, easy to modify (drill holes) | Less insulation; may degrade in sun |
| Tumbler / rotating barrel | Easy to turn; faster compost | Requires sturdy frame; more work to build |
| Three-bin system | Continuous composting; good for large gardens | Needs space; more materials |
| Wire mesh / cage | Very cheap; great airflow | Poor pest control; exposed to rain |
If you don’t find a suitable container, you can get compact compost bins online.
Tip: If you live in an apartment or have limited space, consider vermicomposting (worms in a small bin) or bokashi (fermentation) as indoor-friendly alternatives.
Key Materials & Tools Needed
Common materials and tools for most DIY bins:
Materials
- Wood (pallets, planks) or a plastic barrel/tote or wire mesh
- Screws, nails, zip ties, hinges (if you want a door or lid)
- Hardware cloth or small-gauge mesh (optional) to deter pests
- Non-toxic wood sealant or paint (optional)
Tools
- Drill (for ventilation/drainage holes)
- Saw (if cutting wood or barrels)
- Hammer, screwdriver, measuring tape
- Work gloves and safety glasses
Optional but useful: a compost thermometer(to check hot compost temperatures), a pitchfork or a stirring tool for turning, and a tarp to cover the top during heavy rain.
Step-by-Step: How to Build a DIY Compost Bin
Follow the basic steps below and adapt to your chosen design.
Step 1 — Choose the Right Location
Pick a spot with good drainage, partial shade, and easy access from the kitchen or garden. Too much sun will dry the pile; constant deep shade can keep it too cold.
Step 2 — Size & Design Considerations
Estimate how much organic waste you produce. A common recommended size for a yard is ~1 cubic meter (about 3 ft x 3 ft x 3 ft) — big enough to retain heat but small enough to manage. For balconies or small yards choose a compact bin or a tumbler.
Step 3 — Build the Structure
Examples:
- Wooden pallet box: Stand three pallets in a U-shape, add a fourth pallet as a removable front, secure with screws.
- Plastic garbage can: Drill 1/2″ holes evenly in sides and bottom; add a lid; set on bricks to improve airflow.
- Drum tumbler: Mount a 55-gallon drum on a frame so it pivots; drill holes; add handles to turn.
Step 4 — Ventilation & Drainage
Drill multiple holes (1/4″–1/2″) spaced across the sides and near the bottom for airflow and drainage. Good oxygen flow prevents anaerobic smell and helps microbes thrive.
Step 5 — Start Layering (Browns vs Greens)
Follow the browns vs greens approach:
- Browns: dry leaves, straw, shredded cardboard, paper — carbon-rich
- Greens: fruit/veg scraps, coffee grounds, fresh grass clippings — nitrogen-rich
A good starting ratio is about 3:1 browns to greens by volume. Always cover fresh green loads with a layer of browns to reduce odor and flies.
Step 6 — Moisture & Turning
Moisture should be like a wrung-out sponge. If it’s too dry, decomposition slows — add water and greens. If too wet, add more browns and increase airflow. Turn the pile weekly to aerate; tumblers simplify this.
Step 7 — Cover & Protect
A lid or tarp keeps heavy rain from waterlogging the bin and prevents pests. Use hardware cloth under the lid if rodents are a concern.
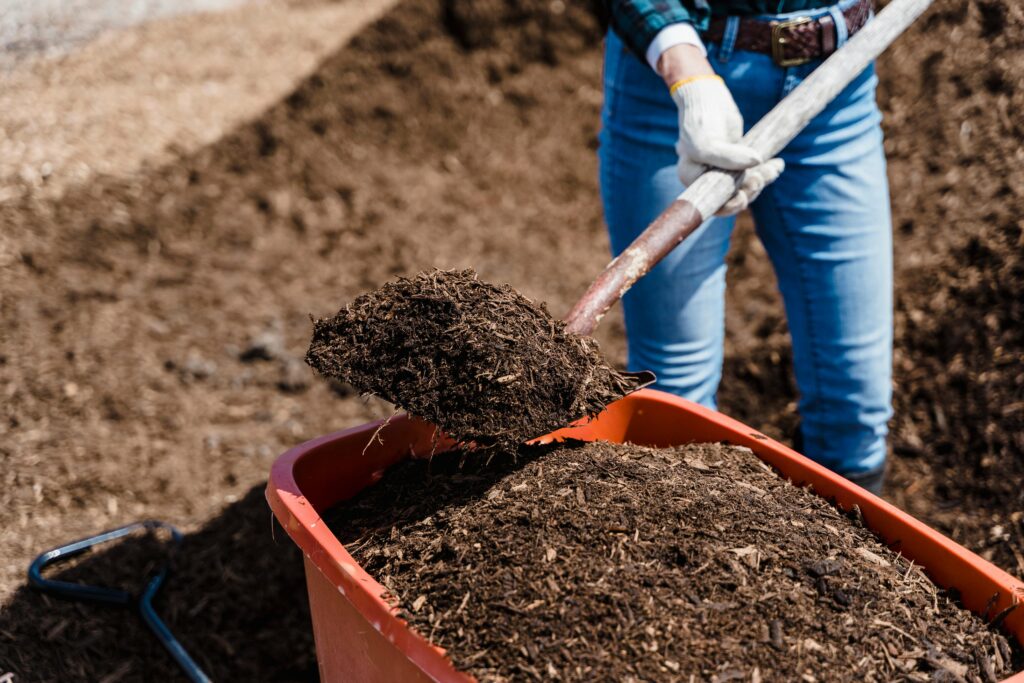
Step 8 — Harvesting Finished Compost
Compost is ready when dark, crumbly, and earthy-smelling. Typical timelines:
- Hot compost: 1–3 months with regular turning and good ratio
- Cold compost: 6 months–1 year with minimal turning
Tip: If building a three-bin system, rotate bins: one for active composting, one for curing, and one for finished compost harvesting.
How to Use & Maintain Your Compost Bin
Simple maintenance keeps the system healthy and productive.
- Feed it regularly: Add kitchen scraps and garden waste; always cap new green loads with browns.
- Turn often: Weekly for hot composting; every 2–3 weeks for slower systems.
- Check moisture: Add water in dry spells; add shredded cardboard or straw if too wet.
- Insulate in winter: Add extra browns and reduce turning frequency — decomposition slows but continues.
What to Compost (and What Not To)
Good Things to Compost
- Fruit and vegetable scraps
- Coffee grounds & tea leaves
- Eggshells (crushed)
- Leaves, straw, yard trimmings
- Shredded paper, cardboard (non-glossy)
- Herbivore manure (chicken, cow, horse) in moderation
Avoid Composting
- Meat, fish, dairy, oily foods (attract pests and smell)
- Pet feces from meat-eating animals
- Diseased plants or plants treated with persistent pesticides
- Glossy or heavily dyed paper, synthetic materials
- Large woody branches (unless chipped or shredded)
Troubleshooting Common Problems
| Problem | Possible Cause | Solution |
|---|---|---|
| Bad smell (rotten/anaerobic) | Too wet or not enough air; too many greens | Add dry browns, stop adding wet items, turn to aerate |
| Pests (rats, raccoons) | Exposed food scraps, meat, open access | Use a lid, avoid meat/dairy, bury scraps under browns, use hardware cloth |
| Slow decomposition | Too dry, too cold, wrong carbon:nitrogen ratio | Moisten pile, add greens or a compost starter, insulate the bin |
| Excessive moisture/sogginess | Poor drainage or heavy rain | Improve drainage, add dry browns, cover bin |
FAQs
How big should my DIY compost bin be?
For a typical family garden, aim for ~1 cubic meter (3ft x 3ft x 3ft). Smaller bins work for balconies or small households — just accept slower decomposition or use vermicomposting.
Can I compost in an apartment?
Yes — vermicomposting (worms) or bokashi (fermentation) are excellent indoor-compatible methods. Keep a small bin in a balcony or a compact tumbler for limited outdoor areas.
How long will it take to make usable compost?
With active hot composting and weekly turning, you can have usable compost in as little as 6–12 weeks. Cold composting typically takes several months to a year.
Is plastic safe for a DIY compost bin?
Durable plastic containers are fine if they’re stable and don’t leach. Many people use food-grade barrels or recycled totes — just ensure adequate ventilation and support.
Conclusion & Next Steps
Creating a DIY compost bin is one of the highest-impact, low-effort sustainability actions you can take at home. It reduces household waste, feeds your soil, and helps the planet. Start with a simple design — a wooden pallet box or modified plastic bin — and iterate as you learn what works best for your climate and routine.
Quick starter plan:
- Choose a bin design (pallet box or plastic tote)
- Set up at an accessible, partially shaded location
- Begin with a 6–8 inch layer of browns (leaves, shredded cardboard)
- Add kitchen greens, cover with browns, and keep moist
- Turn weekly and watch the magic happen